

Hi again!
Here we are just a few weeks out from another Christmas.. where does the time go! I don't know about you guys, but I love being able to include a little something handmade in my gift giving each year but time is not always on my side!
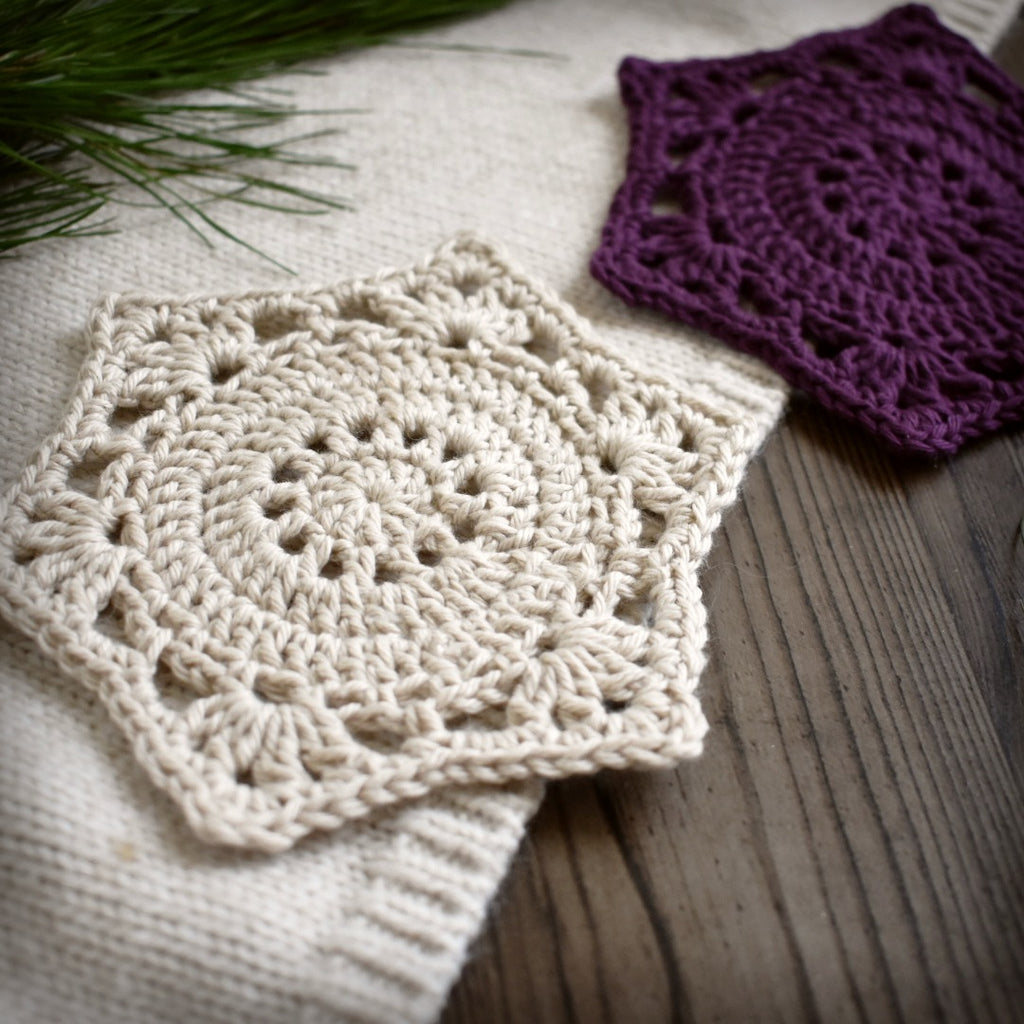
I needed something super quick to whip up as a little extra and have been inspired by the crochet coasters popping up at local markets this year.

Using a similar design as my popular Charlie Bib, I've designed up these super effective boho style coasters, which only take about 15mins to make!
I decided to make these in a DK weight/Number 3 cotton yarn as this creates a beautiful stitch definition which you just cant get with a wool or acrylic.

After I had made up a bunch of these in heaps of colours, I decided I wanted to make some larger ones. Rather than change up the pattern, I had a play with double stranding my yarn and using a bigger hook which produced a perfect upsized version for a soup bowl coaster!

This is a great 'next step' pattern for a beginner wanting to get a bit more adventurous, without committing to a large complicated pattern. Its also amazing for using up those scraps as the mug coaster only uses about 10-15grams of yarn!
The full pattern written out below for FREE, however if you prefer a printable PDF without the Ad's, You can also get the download via the below links as usual!
If you enjoy this pattern, please check out my other patterns available.
You can also find other free patterns published here.

Sundance Coasters
Size;
-
Mug Coaster - 13cm across, point to point after blocking
-
Bowl Coaster – 20cm across, point to point after blocking
Gauge:
As this pattern is so quick to make, I wouldn’t make a gauge swatch separately. You can just complete the first 4 Rounds and the circle should measure about 7cm across (10cm across for the Bowl Coaster). These look better and hold their shape when worked nice and tight!
Materials;
- Yarn; 8ply/Number 3 Cotton. Just over 10 grams for the Mug Coaster, Just over 30 grams for the Bowl Coaster.
- Hook; 3.5mm (mug) or 5.5mm (bowl)
- Yarn Needle
Stitches - US terms;
Sc; Single Crochet
Ch; Chain
Dc; Double Crochet
SlSt; Slip Stitch
Sk; Skip
Dc2tog; Double Crochet 2 Together
Notes;
Mug Coaster and Bowl Coaster are exactly the same pattern. The larger Bowl Coaster is just done by double stranding the yarn and using the larger 5.5mm hook.
Coasters are worked in the round starting with a magic loop.
The chain stitches at the start of each row count as the first stitch until Round 6 and 7. A number infront of a stitch – e.g 2Hdc – means you work 2 Hdc stitches in the one stitch. A number following a stitch – e.g Hdc 2 – means work a Hdc in each of the next 2 stitches. Sequences between astericks are repeated the number of times shown – e.g *2Sc, Sc* x5
Stitch count is included in brackets after the row instructions.
I highly suggest gently BLOCKING the final coasters to set the stitches. You can also use fabric starch to spray your coasters afterwards so they are stiffer.
Lets Start!
Start by creating a magic loop.
If you do not like magic loop you can just Ch 5 and SlSt to first Ch to create a ring. I prefer the magic loop method as this doesn’t create a hole in the center of your work.
Round 1 – Ch 3 (This counts as 1 Dc Stitch), Dc 11 into the magic loop (or chain ring as above). Join in the round with a SlSt around the beginning Ch 3. Pull Magic Loop Closed. (12)


Round 2 – Ch 4 (This counts as 1 Dc Stitch + a Ch 1), *Dc 1, Ch 1*, repeat between ** for each St in the round. Join with a SlSt around the beginning Ch 4. (24)
You will see you have 12 ‘gaps’ created in round 2. In the next round, you will only be working into these gaps.

Round 3 – Ch 3 (This counts as 1 Dc), Dc 2 into the first Ch Gap to the left. Dc 3 into each of the remaining 11 Ch Gaps, Join around starting chain with a SlSt. (36)

Round 4 – Ch 3 (This counts as 1 Dc), Dc 1, 2Dc, *Dc 2, 2Dc* Repeat between ** for remainder of round. Join around starting chain with a SlSt. (48)

Round 5 – Ch 3 (This counts as 1 Sc + 2 Chains), Sk 1, *Sc, Ch 2, Sk 1*, Repeat between ** for remainder of round. Join around starting chain with a SlSt. (72)


The following round will only be worked into the chain gaps created in round 5.
Round 6 – Ch 1 (This does not count as a stitch), Sc 1 into first Ch gap, *Ch 3, Sk the next Ch gap, in the next Ch gap work the following (Dc2tog, Ch 2, Dc2tog, Ch 3, Dc2tog, Ch 2, Dc2tog), Ch 3, Sk Next Ch gap, Sc into next Ch gap* repeat between ** until you have 1 Ch gap remaining, Ch 3, Sk final Ch gap, join with a SlSt into the first St. (no St count needed)


The following round will again just be worked into the gaps created by the chain stitches.
Round 7 – Ch 1 (This does not count as a stitch), *Sc 3 into the first Ch gap, Sc 2 into the next gap, (Sc, Dc, Ch 1, Dc, Sc) into next gap, Sc 2 into next gap, Sc 3 into next gap* Repeat between ** for whole round. (no St count needed)

Join to First St with an Invisible Join.
- Cut Yarn and pull yarn through.
- Using yarn needle, sew yarn into first stitch of round.
- Thread needle through the Back Loop Only of the last stitch in round and through to the back of the project.
Pull to close the gap and tie off yarn, weaving in the end.


And you're finished!
