
2021 is coming to an end! So let's finish this year with one last little freebie.
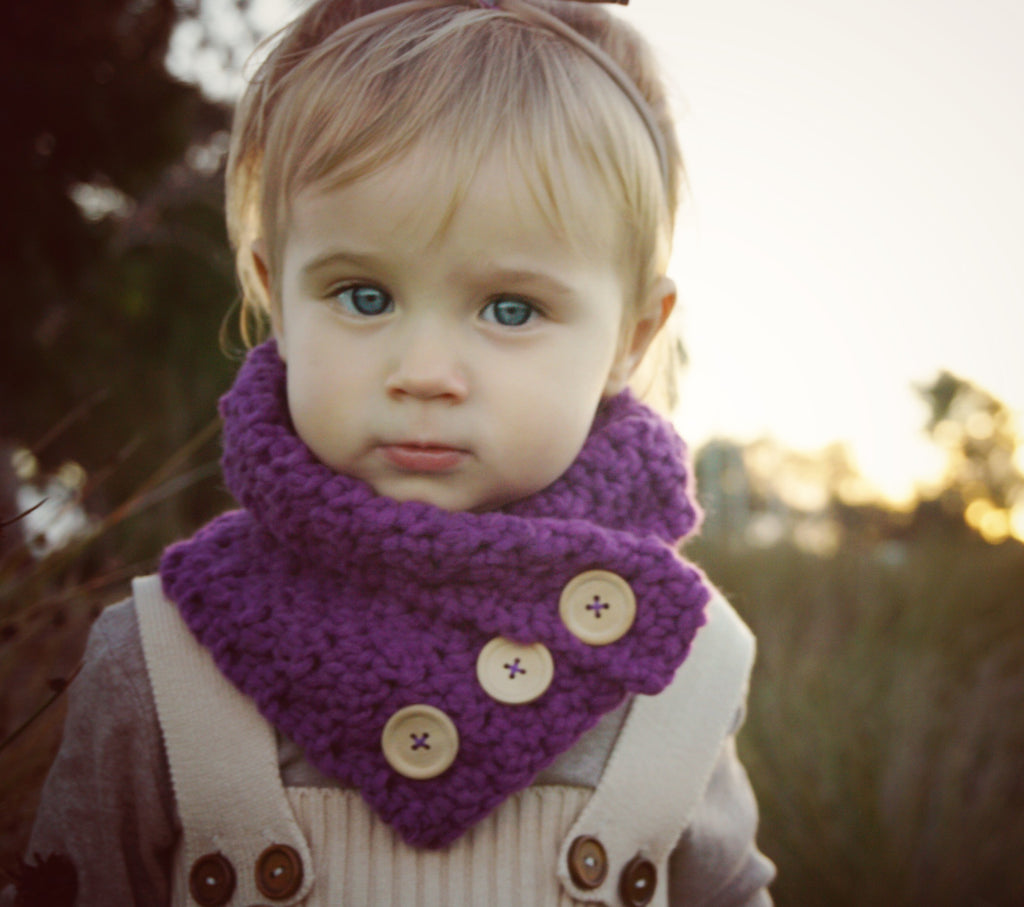
The Dekota Cowl was one of my earliest patterns, a fun, chunky buttoned cowl in the lemon peel stitch.

You will be absolutely shocked when you realise how simple this cowl actually is. The cowl is nothing more than a rectangle, with some specially placed buttons and button holes and some clever folding!

This pattern uses the same weight yarn as the Knitted Stephanie Beanie and my latest pattern - the Rory Beanie. The yarn is a 14 ply Super Chunky/Bulky yarn or a number '5' yarn. But if you are having trouble finding the right yarn, dont worry! This yarn can easily be substituted with 2 strands of Aran Weight/Number 4 yarn.

The full pattern is written out below for FREE, however if you prefer a printable PDF without the Ad's, you can also get the download via the below links as usual!
If you enjoy this pattern, please check out my other patterns available.
You can also find other free patterns published here.
lets begin!
Dekota Cowl
Sizes;
- Toddler – Width Unfolded 19cm, Length 53cm
- Child – Width Unfolded 23cm, Length 68cm
- Teen/Womens – Width Unfolded 30cm, Length 86cm
Gauge;
Complete the first 3 rows of the pattern.
This swatch should measure; Toddler - 19cm x 4cm. Child - 23cm x 4cm or Teen/Womens - 28cm x 4cm.
Materials;
- Yarn; 14Ply Super Chunky yarn/Number 5 Bulky. (look for a yarn with a 7-8mm recommended hook size. I suggest Mawson by Moda Vera, Mille II by Lana Grossa, Merino Super-Sport by Katia, Alaska by Bergere De France or Alpha by Schoeller + Stahl.
You can also use a Worsted weight/10Ply held double. 100grams for the toddler size, 150grams for child size, 250grams for the teen/womens size.
- Hook; 8mm hook
- Yarn Needle
- 3x Buttons - approx. 2.5cm in diameter for 1-3y, 3cm for 4-10y & 3.5cm for Teen/Adult.
- Cotton and needle for sewing buttons.
Abbreviations - US Terms;
- Sc - Single Crochet
- Dc - Double Crochet
- SlSt - Slip Stitch
- Sk - Skip
- Ch - Chain
Notes;
Cowl is worked as a flat rectangle with button holes put in place with skipped stitches.
Chain stitches at the end of the row are not included in the stitch count. A number infront of a stitch – e.g 2Hdc – means you work 2 Hdc stitches in the one stitch. A number following a stitch – e.g Hdc 2 – means work a Hdc in each of the next 2 stitches. Sequences between astericks are repeated the number of times shown – e.g *2Sc, Sc* x5
Stitch count is not included throughout the pattern as it is the same number as the starting row throughout.
Dekota Cowl
First part of pattern is written for size Toddler with the other sizes in brackets.
Sizes – Toddler (Child, Teen/Womens)
Cowl – 8mm hook
Chain 19(23, 29)
Row 1 – Starting in the second chain from the hook, *Sc, Dc* repeat for Row, Ch 1, Turn. [18(22, 28)]
Row 2 - 42(53, 68) – *Sc, Dc* repeat for Row Ch 1, Turn.
*Add or remove rows here if scarf needs to be shortened or lengthened.


Sizes are written separately from here
Size - Toddler
Button hole row - Row 43 – Sc 1, Sk1, Ch1, Sc, Dc, Sc, Dc, Sc, Sk1, Ch1, Sc, Dc, Sc, Sk1, Ch1, Sc, Dc, Sc, Sk1, Ch1, Sc, Dc, Ch1, Turn. Place a stitch marker on the side of your work that was facing away from you while working this row.
Row 44 - **Sc 1, Dc 1** repeat until end of row, Ch 1, turn. *ensure to work into the gaps created in the previous row.
Row 45 - **Sc 1, Dc 1** repeat until end of row. Tie off

Attaching the Buttons
Laying the scarf with the stitch marked side facing up and button holes on the left.
Placement for the 3x buttons are as below.


Use your needle and thread to secure the 3x 2.5cm wide buttons.

Size - Child
Button hole row - Row 54 – Sc 1, Sk2, Ch2, Dc, Sc, Dc, Sc, Dc, Sk2, Ch2, Sc, Dc, Sc, Sk2, Ch2, Dc, Sc, Dc, Sk2, Ch2, Sc, Dc, Ch1, Turn. Place a stitch marker on the side of your work that was facing away from you while working this row.
Row 55-56 - **Sc 1, Dc 1** repeat until end of row, Ch 1, turn. *ensure to work into the gaps created in the previous row.
Row 57 - **Sc 1, Dc 1** repeat until end of row. Tie off

Attaching the Buttons
Laying the scarf with the stitch marked side facing up and button holes on the left.
Placement for the 3x buttons are as below.


Use your needle and thread to secure the 3x 3cm wide buttons.

Size – Teen/Womens
Button hole row - Row 69 – Sc, Dc, Sc, Sk2, Ch2, Dc, Sc, Dc, Sc, Dc, Sc, Dc, Sk2, Ch2, Sc, Dc, Sc, Dc, Sk2, Ch2, Sc, Dc, Sc, Dc, Sk2, Ch2, Sc, Dc, Ch1, Turn. Place a stitch marker on the side of your work that was facing away from you while working this row.
Row 70-72 - **Sc 1, Dc 1** repeat until end of row, Ch 1, turn. *ensure to work into the gaps created in the previous row.
Row 73 - **Sc 1, Dc 1** repeat until end of row. Tie off

Attaching the Buttons
Laying the scarf with the stitch marked side facing up and button holes on the left.
Placement for the 3x buttons are as below.


Use your needle and thread to secure the 3x 3.5cm wide buttons.

All Sizes
How to wear
- Lay scarf with button is the bottom left corner as shown, Fold down top edge so the top 2 button holes are ontop of each other.

2. Flip scarf over

3. Fold back right hand side as shown below.

4. Fold left hand side down in the same manner lining up the button holes over the buttons. The top button will be going through 2x layers.

Finished!

Thank you so much I loved it,
Monique on