

Hi Guys,
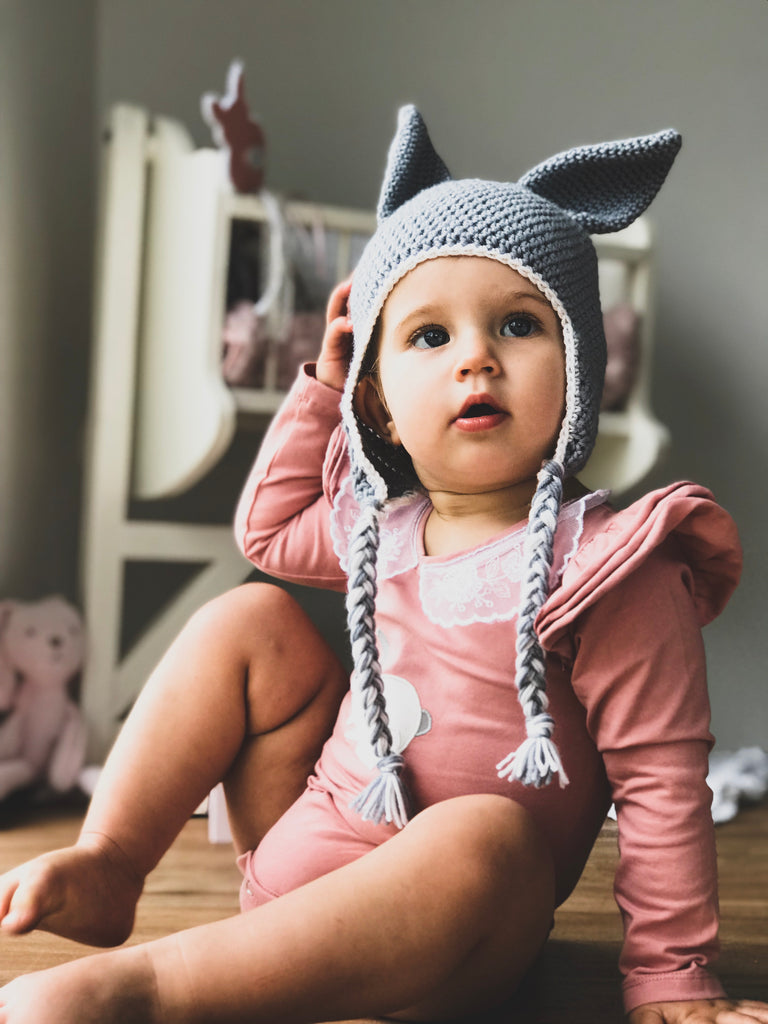
Today I'm delighted to bring you this free crochet pattern for a super cute Bunny Beanie. These beanies were my bread and butter when I first started out. So quick to make and they sold like hot-cakes at the local markets.
With Easter only a short time away (I know! I'm sorry for the reminder!) I thought this would be the perfect time to pop this one up on the blog!

This pattern is a basic top down beanie is sizes 0-3m, 3-6m, 6-12m, 1-3Y and 4-10Y.
When I first made this pattern I used an 8Ply Superwash Merino with a 5mm hook. However this has been remade using nice thick 8ply acrylic and even been done with Aran weight yarn with success. So its a very forgiving pattern to follow and easy to adjust as you go if needed by adding or removing a row here and there.

I wanted to add a little something to this beanie, so I included some optional instructions on how to add some flowers or a bow for that special final touch!

This pattern is a bit lengthy due to all the sizes so I have removed some of the less necessary photos in this blog post, however all instructions are still there.
The full pattern is written out below for FREE, however if you prefer a printable PDF without the Ad's, with extra photos and so you can print out the required pages only, you can get the download via the below links as usual!
If you enjoy this pattern, please check out my other patterns available.
You can also find other free patterns published here.

Let's Begin!
Bunny Beanie
Sizes;
- 0-3m - Fits head circumference - 33-38cm
- 3-6m - Fits head circumference - 38-43cm
- 6-12m - Fits head circumference - 41-48cm
- 1-3y - Fits head circumference - 46-51cm
- 4-10y - Fits head circumference - 48-53cm
Gauge;
Hdc with a 5mm hook
10cm x 10cm = 15 Stitches across and 14 Rows
You can also complete the first 6 rows of the beanie and measure diameter of 9.5cm. Beanie is easy to adjust by adding or removing rows to match any gauge.
Materials;
- Yarn; I used a 10ply superwash merino with a tight tension for this beanie. If you have a looser tension you may find a 8ply acrylic or wool with a 4.5mm hook is more suitable. You will need 75 to 100grams. For the flowers a thinner yarn (such as an 8 ply cotton) works best. Only about 20 grams of a green, white and pink.
- Hook; 5mm hook (or hook needed to get gauge), 4mm and 3mm
- Yarn Needle
- Stitchmarker
Abbreviations - US Terms;
- Sc - Single Crochet
- Dc - Double Crochet
- Hdc - Half Double Crochet
- Hdc2tog - Half Double Crochet 2 stitches together
- SlSt - Slip Stitch
- Sk - Skip
- Ch - Chain
Notes;
Beanie is a simple top down beanie worked in the round. Bunny ears and flowers/bow are made separately and sewn in place.
Chain stitches at the end of the row are not included in the stitch count. A number in front of a stitch – e.g 2Hdc – means you work 2 Hdc stitches in one stitch. A number following a stitch – e.g Hdc 2 – means work a Hdc in each of the next 2 stitches. Sequences between asterisks are repeated the number of times shown – e.g *2Sc, Sc* x5
Stitch count is included in brackets after the round instructions. Instructions for the Plaits and the Flower/ Bow accessories are at the very end.
Size 0-3m
Body of beanie – 5mm hook
Round 1 – Create a magic loop, Ch 1 and crochet 8 Hdc into the loop. Join to first stitch with a SlSt and Ch 1. (8)
Round 2 – 2Hdc in each stitch. Join to first St and Ch 1. (16)
Round 3 - *2Hdc, Hdc* repeat for round, join and Ch 1. (24)
Round 4 - *2Hdc, Hdc 2* repeat for round, join and Ch 1. (32)
Round 5 - *2Hdc, Hdc 3* repeat for round, join and Ch 1. (40)
Round 6 - *2Hdc, Hdc 4* repeat for round, join and Ch 1. (48)
Measure your circle. It should measure 9.5cm in diameter. If not; you may need to adjust your hook size.
Round 7– 19– Hdc all stitches in round, join with a SlSt and ch1. (48)
Measure the height of your beanie. It should measure 13cm in height. Add or remove rounds as necessary to obtain desired length. Cut yarn and tie off.
Ear Flaps – 5mm hook
Right ear flap
Flatten the beanie with the join at Center Back and mark the Center Front with a stitch marker.

With the beanie upside down and facing you, join the yarn in the 10th stitch to the left of Center Front.
Row 1 – Hdc in join and next 8 stitches, Ch 1, turn. (9)
Row 2 – Hdc2tog, Hdc 5, Hdc2tog, Ch 1, turn. (7)
Row 3 – Hdc 7, Ch 1, turn. (7)
Row 4 – Hdc2tog, Hdc 3, Hdc2tog, Ch 1, turn. (5)
Row 5 – Hdc 5, Ch1, turn. (5)
Row 6 – Hdc2tog, Ch 1, Sk 1, Hdc2tog. Tie off. (3) (The *Ch1, Sk 1* creates a hole to loop your plaits through)
Left ear flap
Now with the beanie still upside down and with the right side out, join the yarn in the 19th stitch right of Center Front.
Repeat Rows 1-6 of the Right Ear Flap Instructions.
For a nicer edge, weave in ends and single crochet around the rim of the beanie including ear flaps. I’ve done this in edging in white for effect.

Ears – Make 2x - 5mm hook
Ears are made in the round continuously. Do not join with a slip stitch at the end of each round – a stitch marker will help you to keep count if needed.
Round 1 – Create magic loop. Sc 4 in the loop. (4)
Round 2 – 2Sc in each stitch round (8)
Round 3 – Sc in each stitch round (8)
Round 4 - *2Sc, Sc 1* repeat between * for round (12)
Round 5 – Sc in each stitch round (12)
Round 6 - *2Sc, Sc 2* repeat between * for round (16)
Round 7 – Sc in each stitch round (16)
Round 8 - *2Sc, Sc 3* repeat between * for round (20)
Round 9-16 – Sc in each stitch round (20)
Round 17 - *Sc2tog, Sc 3* repeat between * for round (16)
Round 18 - *Sc2tog, Sc 2* repeat between * for round. Tie off. (12)
Leave a long tail which you can use to attach the ears.
Flatten the cones to create an ear shape. Stitch the ears in place. To get the best position, put the beanie on the model and use stitch markers to mark the best position for the ears. Curving the base of the into a ‘c’ shape when attaching will help ears stay upright.
See the end of the Pattern for the Accessories and Final Touches.


Size 3-6m
Body of beanie – 5mm hook
Round 1 – Create a magic loop, Ch 1 and crochet 8 Hdc into the loop. Join to first stitch with a SlSt and Ch 1. (8)
Round 2 – 2Hdc in each stitch. Join to first St and Ch 1. (16)
Round 3 - *2Hdc, Hdc* repeat for round, join and Ch 1. (24)
Round 4 - *2Hdc, Hdc 2* repeat for round, join and Ch 1. (32)
Round 5 - *2Hdc, Hdc 3* repeat for round, join and Ch 1. (40)
Round 6 - *2Hdc, Hdc 4* repeat for round, join and Ch 1. (48)
Round 7 - *2Hdc, Hdc 5* repeat for round, join and Ch 1 (56)
Measure your circle. It should measure 11.5cm in diameter. If not; you may need to adjust your hook size.
Round 8– 20– Hdc all stitches in round, join with a SlSt and ch1. (56)
Measure the height of your beanie. It should measure 14cm in height. Add or remove rounds as necessary to obtain desired length. Cut yarn and tie off.
Ear Flaps – 5mm hook
Right ear flap
Flatten the beanie with the join at Center Back and mark the Center Front with a stitch marker.
With the beanie upside down and facing you, join the yarn in the 12th stitch to the left of Center Front.
Row 1 – Hdc in join and next 10 stitches, Ch 1, turn. (11)
Row 2 – Hdc2tog, Hdc 7, Hdc2tog, Ch 1, turn. (9)
Row 3 – Hdc 9, Ch 1, turn. (9)
Row 4 – Hdc2tog, Hdc 5, Hdc2tog, Ch 1, turn. (7)
Row 5 – Hdc 7, Ch 1, turn. (7)
Row 6 – Hdc2tog, Hdc 3, Hdc2tog, Ch 1, turn. (5)
Row 7 – Hdc 5, Ch 1, turn. (5)
Row 8 – Hdc2tog, Ch 1, Sk 1, Hdc2tog. Tie off. (3) (The *Ch 1, Sk 1* creates a hole to loop your plaits through)
Left ear flap
Now with the beanie still upside down and with the right side out, join the yarn in the 21st stitch right of Center Front.
Repeat Rows 1-8 of the Right Ear Flap Instructions.
For a nicer edge, weave in ends and single crochet around the rim of the beanie including ear flaps. I’ve done this in edging in white for effect.
Ears – Make 2x - 5mm hook
Ears are made in the round continuously. Do not join with a slip stitch at the end of each round – a stitch marker will help you to keep count if needed.
Round 1 – Create magic loop. Sc 4 in the loop. (4)
Round 2 – 2Sc in each stitch round (8)
Round 3 – Sc in each stitch round (8)
Round 4 - *2Sc, Sc 1* repeat between * for round (12)
Round 5 – Sc in each stitch round (12)
Round 6 - *2Sc, Sc 2* repeat between * for round (16)
Round 7 – Sc in each stitch round (16)
Round 8 - *2Sc, Sc 3* repeat between * for round (20)
Round 9-16 – Sc in each stitch round (20)
Round 17 - *Sc2tog, Sc 3* repeat between * for round (16)
Round 18 - *Sc2tog, Sc 2* repeat between * for round. Tie off. (12)
Leave a long tail which you can use to attach the ears.
Flatten the cones to create an ear shape. Stitch the ears in place. To get the best position, put the beanie on the model and use stitch markers to mark the best position for the ears. Curving the base of the into a ‘c’ shape when attaching will help ears stay upright.
See the end of the Pattern for the Accessories and Final Touches.
Size 6-12m
Body of beanie – 5mm hook
Round 1 – Create a magic loop, Ch 1 and crochet 8 Hdc into the loop. Join to first stitch with a SlSt and Ch 1. (8)
Round 2 – 2Hdc in each stitch. Join to first St and Ch 1. (16)
Round 3 - *2Hdc, Hdc* repeat for round, join and Ch 1. (24)
Round 4 - *2Hdc, Hdc 2* repeat for round, join and Ch 1. (32)
Round 5 - *2Hdc, Hdc 3* repeat for round, join and Ch 1. (40)
Round 6 - *2Hdc, Hdc 4* repeat for round, join and Ch 1. (48)
Round 7 - *2Hdc, Hdc 5* repeat for round, join and Ch 1 (56)
Round 8 - *2Hdc, Hdc 6* repeat for round, join, Ch 1 (64)
Measure your circle. It should measure 13cm in diameter. If not; you may need to adjust your hook size.
Round 9– 23– Hdc all stitches in round, join with a SlSt and ch1. (64)
Measure the height of your beanie. It should measure 16.5cm in height. Add or remove rounds as necessary to obtain desired length. Cut yarn and tie off.
Ear Flaps – 5mm hook
Right ear flap
Flatten the beanie with the join at Center Back and mark the Center Front with a stitch marker.
With the beanie upside down and facing you, join the yarn in the 14th stitch to the left of Center Front.
Row 1 – Hdc in join and next 12 stitches, Ch 1, turn. (13)
Row 2 – Hdc2tog, Hdc 9, Hdc2tog, Ch 1, turn. (11)
Row 3 – Hdc 11, Ch 1, turn. (11)
Row 4 – Hdc2tog, Hdc 7, Hdc2tog, Ch 1, turn. (9)
Row 5 – Hdc 9, Ch 1, turn. (9)
Row 6 – Hdc2tog, Hdc 5, Hdc2tog, Ch 1, turn. (7)
Row 7 – Hdc 7, Ch 1, turn. (7)
Row 8 – Hdc2tog, Hdc 3, Hdc2tog, Ch 1, turn. (5)
Row 9 – Hdc 5, Ch 1, turn. (5)
Row 10 – Hdc2tog, Ch 1, Sk 1, Hdc2tog. Tie off. (3) (The *Ch 1, Sk 1* creates a hole to loop your plaits through)
Left ear flap
Now with the beanie still upside down and with the right side out, join the yarn in the 23rd stitch right of Center Front.
Repeat Rows 1-10 of the Right Ear Flap Instructions.
For a nicer edge, weave in ends and single crochet around the rim of the beanie including ear flaps. I’ve done this in edging in white for effect.
Ears – Make 2x - 5mm hook
Ears are made in the round continuously. Do not join with a slip stitch at the end of each round – a stitch marker will help you to keep count if needed.
Round 1 – Create magic loop. 4Sc in the loop. (4)
Round 2 – 2Sc in each stitch round (8)
Round 3 – Sc in each stitch round (8)
Round 4 - *2Sc, Sc 1* repeat between * for round (12)
Round 5 – Sc in each stitch round (12)
Round 6 - *2Sc, Sc 2* repeat between * for round (16)
Round 7 – Sc in each stitch round (16)
Round 8 - *2Sc, Sc 3* repeat between * for round (20)
Round 9 – Sc in each stitch round (20)
Round 10 - *2Sc, Sc 4* repeat between * for round (24)
Round 11 - 18 – Sc in each stitch round (24)
Round 19 - *Sc2tog, Sc 3* repeat between * 4x, Sc2tog, Sc 2 (19)
Round 20 - 21 - Sc in each stitch round. Tie off. (19) Leave a long tail which you can use to attach the ears.
Flatten the cones to create an ear shape. Stitch the ears in place. To get the best position, put the beanie on the model and use stitch markers to mark the best position for the ears. Curving the base of the into a ‘c’ shape when attaching will help ears stay upright.
See the end of the Pattern for the Accessories and Final Touches.
Size 1-3y
Body of beanie – 5mm hook
Round 1 – Create a magic loop, Ch 1 and crochet 8 Hdc into the loop. Join to first stitch with a SlSt and Ch 1. (8)
Round 2 – 2Hdc in each stitch. Join to first St and Ch 1. (16)
Round 3 - *2Hdc, Hdc* repeat for round, join and Ch 1. (24)
Round 4 - *2Hdc, Hdc 2* repeat for round, join and Ch 1. (32)
Round 5 - *2Hdc, Hdc 3* repeat for round, join and Ch 1. (40)
Round 6 - *2Hdc, Hdc 4* repeat for round, join and Ch 1. (48)
Round 7 - *2Hdc, Hdc 5* repeat for round, join and Ch 1 (56)
Round 8 - *2Hdc, Hdc 6* repeat for round, join, Ch 1 (64)
Round 9 - *2Hdc, Hdc 7* repeat for round, join, Ch 1 (72)
Measure your circle. It should measure 14.5cm in diameter. If not; you may need to adjust your hook size.
Round 10 – 25– Hdc all stitches in round, join with a SlSt and Ch 1. (72)
Measure the height of your beanie. It should measure 18cm in height. Add or remove rounds as necessary to obtain desired length. Cut yarn and tie off.
Ear Flaps – 5mm hook
Right ear flap
Flatten the beanie with the join at Center Back and mark the Center Front with a stitch marker.
With the beanie upside down and facing you, join the yarn in the 15th stitch to the left of Center Front.
Row 1 – Hdc in join and next 14 stitches, Ch 1, turn. (15)
Row 2 – Hdc2tog, Hdc 11, Hdc2tog, Ch 1, turn. (13)
Row 3 – Hdc 13, Ch 1, turn. (13)
Row 4 – Hdc2tog, Hdc 9, Hdc2tog, Ch 1, turn. (11)
Row 5 – Hdc 11, Ch 1, turn. (11)
Row 6 – Hdc2tog, Hdc 7, Hdc2tog, Ch 1, turn. (9)
Row 7 – Hdc 9, Ch 1, turn. (9)
Row 8 – Hdc2tog, Hdc 5, Hdc2tog, Ch 1, turn work. (7)
Row 9 – Hdc 7, ch1, turn work. (7)
Row 10 – Hdc2tog, Hdc 1, ch 1, Sk 1, Hdc 1, Hdc2tog. Tie off. (5) (The *Ch 1, Sk 1* creates a hole to loop your plaits through)
Left ear flap
Now with the beanie still upside down and with the right side out, join the yarn in the 24rd stitch right of Center Front.
Repeat Rows 1-10 of the Right Ear Flap Instructions.
For a nicer edge, weave in ends and single crochet around the rim of the beanie including ear flaps. I’ve done this in edging in white for effect.
Ears – Make 2x - 5mm hook
Ears are made in the round continuously. Do not join with a slip stitch at the end of each round – a stitch marker will help you to keep count if needed.
Round 1 – Create magic loop. Sc 4 in the loop. (4)
Round 2 – 2Sc in each stitch round (8)
Round 3 – Sc in each stitch round (8)
Round 4 - *2Sc, Sc 1* repeat between * for round (12)
Round 5 – Sc in each stitch round (12)
Round 6 - *2Sc, Sc 2* repeat between * for round (16)
Round 7 – Sc in each stitch round (16)
Round 8 - *2Sc, Sc 3* repeat between * for round (20)
Round 9 – Sc in each stitch round (20)
Round 10 - *2Sc, Sc 4* repeat between * for round (24)
Round 11 - 12 – Sc in each stitch round (24)
Round 13 - *2Sc, Sc 5* repeat between * for round (28)
Round 14 -21 – Sc in each stitch round (28)
Round 22 - *Sc2tog, Sc 3* repeat between * 5x, Sc2tog, Sc (22)
Round 23 - 24 - Sc in each stitch round. Tie off. (22) Leave a long tail which you can use to attach the ears.
Flatten the cones to create an ear shape. Stitch the ears in place. To get the best position, put the beanie on the model and use stitch markers to mark the best position for the ears. Curving the base of the into a ‘c’ shape when attaching will help ears stay upright.
See the end of the Pattern for the Accessories and Final Touches.
Size 4-10y
Body of beanie – 5mm hook
Round 1 – Create a magic loop, Ch 1 and crochet 8 Hdc into the loop. Join to first stitch with a SlSt and Ch 1. (8)
Round 2 – 2Hdc in each stitch. Join to first St and Ch 1. (16)
Round 3 - *2Hdc, Hdc* repeat for round, join and Ch 1. (24)
Round 4 - *2Hdc, Hdc 2* repeat for round, join and Ch 1. (32)
Round 5 - *2Hdc, Hdc 3* repeat for round, join and Ch 1. (40)
Round 6 - *2Hdc, Hdc 4* repeat for round, join and Ch 1. (48)
Round 7 - *2Hdc, Hdc 5* repeat for round, join and Ch 1 (56)
Round 8 - *2Hdc, Hdc 6* repeat for round, join, Ch 1 (64)
Round 9 - *2Hdc, Hdc 7* repeat for round, join, Ch 1 (72)
Round 10 - *2Hdc, Hdc 8* repeat for round, join, Ch 1 (80)
Measure your circle. It should measure 16cm in diameter. If not; you may need to adjust your hook size.
Round 11 – 26– Hdc all stitches in round, join with a SlSt and Ch 1. (80)
Measure the height of your beanie. It should measure 19cm in height. Add or remove rounds as necessary to obtain desired length. Cut yarn and tie off.
Ear Flaps – 5mm hook
Right ear flap
Flatten the beanie with the join at Center Back and mark the Center Front with a stitch marker.
With the beanie upside down and facing you, join the yarn in the 18th stitch to the left of Center Front.
Row 1 – Hdc in join and next 16 stitches, Ch 1, turn work. (17)
Row 2 – Hdc2tog, Hdc 12, Hdc2tog, Ch 1, turn. (15)
Row 3 – Hdc 15, Ch 1, turn. (15)
Row 4 – Hdc2tog, Hdc 11, Hdc2tog, Ch 1, turn. (13)
Row 5 – Hdc 13, Ch 1, turn. (13)
Row 6 – Hdc2tog, Hdc 9, Hdc2tog, Ch 1, turn. (11)
Row 7 – Hdc 11, Ch 1, turn. (11)
Row 8 – Hdc2tog, Hdc 7, Hdc2tog, Ch 1, turn. (9)
Row 9 – Hdc 9, Ch 1, turn. (9)
Row 10 – Hdc2tog, Hdc 5, Hdc2tog, Ch 1, turn. (7)
Row 11 – Hdc 7, Ch 1, turn. (7)
Row 12 – Hdc2tog, Hdc 1, Ch 1, Sk 1, Hdc 1, Hdc2tog. Tie off. (5) (The *Ch 1, Sk 1* creates a hole to loop your plaits through)
Left ear flap
Now with the beanie still upside down and with the right side out, join the yarn in the 27th stitch right of Center Front.
Repeat Rows 1-12 of the Right Ear Flap Instructions.
For a nicer edge, weave in ends and single crochet around the rim of the beanie including ear flaps. I’ve done this in edging in white for effect.
Ears – Make 2x - 5mm hook
Ears are made in the round continuously. Do not join with a slip stitch at the end of each round – a stitch marker will help you to keep count if needed.
Round 1 – Create magic loop. Sc 4 in the loop. (4)
Round 2 – 2Sc in each stitch round (8)
Round 3 – Sc in each stitch round (8)
Round 4 - *2Sc, Sc 1* repeat between * for round (12)
Round 5 – Sc in each stitch round (12)
Round 6 - *2Sc, Sc 2* repeat between * for round (16)
Round 7 – Sc in each stitch round (16)
Round 8 - *2Sc, Sc 3* repeat between * for round (20)
Round 9 – Sc in each stitch round (20)
Round 10 - *2Sc, Sc 4* repeat between * for round (24)
Round 11 - 12 – Sc in each stitch round (24)
Round 13 - *2Sc, Sc 5* repeat between * for round (28)
Round 14 -21 – Sc in each stitch round (28)
Round 22 - *Sc2tog, Sc 3* repeat between * 5x, Sc2tog, Sc (22)
Round 23 - 24 - Sc in each stitch round. Tie off. (22) Leave a long tail which you can use to attach the ears.
Flatten the cones to create an ear shape. Stitch the ears in place. To get the best position, put the beanie on the model and use stitch markers to mark the best position for the ears. Curving the base of the into a ‘c’ shape when attaching will help ears stay upright.
See the end of the Pattern for the Accessories and Final Touches.
Accessories and Final Touches
Plaits
The make the plaits, cut 24 lengths of yarn 2.5x the length you wish for the plaits to be. I did 12x lengths in grey and 12x lengths in white
Take 12 lengths and fold in half. Using a crochet hook, pull the loop through the hole in the end of the ear flap and pull the ends through the loop to secure in place. Divide the strands into 3 and plait, knotting the end to secure the plait and trim the ends. Repeat on the other side with the other 12 lengths of yarn.


Option 1 - Flowers
For this bunch of flowers you will be making the following depending on the beanie size your making;
0-3m – 2x leaves, 2x Mini Flowers, 1 Medium Flower
3-6m - 2x leaves, 2x Mini Flowers, 2x Medium Flowers
6-12m - 2x leaves, 2x Mini Flowers, 2x Medium Flowers
1-3y - 2x leaves, 2x Mini Flowers, 1x Medium Flower and 1x Large Flower
4-10y - 2x leaves, 2x Mini Flowers, 2x Medium Flowers and 1x Large Flower
You can add more/less flowers as you wish. Take your time with the flowers, the hook is really small and fiddly. You won’t notice any missed stitches so just do the best you can!
Leaves
Make 2x in Green Yarn
0-3m, 3-6m – 3mm hook,
6-12m – 4mm hook,
1-3y, 4-10y – 5mm hook,
Chain 6.
Sc in 2nd chain from hook. Continuing to work down the chain; Hdc, Dc 2, 6Dc in the end chain. Working up the other side of the chain; Dc 2, Hdc, Sc, Do not join yet! Ch 2, Sc in second chain from hook, join to first Sc with SlSt. Tie off.

Mini Flower – 3mm hook
Chain 16.
SlSt in 2nd chain from hook, working down the chain - 2Dc, SlSt, 2Dc, SlSt, 2Hdc, SlSt, 2Hdc, SlSt, 2sc, SlSt, 2sc, SlSt 3. Tie off.
Roll into flower with the smaller end in the middle. Use your embroidery needle to feed the tails through to the underside of the rose. Use 1 tail to weave through the layers, picking up the chain stitch. Repeat 3 or 4 times then tie off to the other tail to secure.
Medium Flower – 3mm hook
Chain 23
SlSt in 2nd chain from hook, 3Dc, SlSt, 3Dc, SlSt, 3Dc, SlSt, 3Dc, SlSt, 3Hdc, SlSt, 3Hdc, SlSt, 3Hdc, SlSt, 2Sc, SlSt, 2Sc, SlSt 3. Tie off. Starting at the chain end; roll into flower and use tail to sew flower in place as above.
Large Flower – 3mm hook
Chain 26
SlSt in 2nd chain from hook, 5Dc, SlSt, 5Dc, SlSt, 5Dc, SlSt, 5Dc, SlSt, 5Hdc, SlSt, 5Hdc, SlSt, 5Hdc, SlSt, 5Sc, SlSt, 5Sc, SlSt, 5Sc, SlSt next 2. Tie off (you will have 2 chains remaining )
Starting at the chain end; roll into flower and use tail to sew flower in place as above.


Use tails to secure the flowers and the leaves into place on the beanie. I start off by positioning and hand sewing the leaves first – using a basic running stitch around the edge of the leaf. Then layer on the flowers.
Option 2 - Bow - 5mm hook
Option 2 – Bow – 5mm hook
0-3m, 3-6m – Small
6-12m – Medium
1-3y, 4-10y – Large
Written for size small with other sizes in brackets
e.g Small (Medium, Large)
Chain 8(11, 14) – leaving a 20cm tail
Row 1-28(42, 56) – Sc 7(10, 12), Ch 1, turn. [7(10, 12)]
Row 29(43, 57) – Sc 5(8, 10), Ch 1, and turn 90 degrees. Sc into side of same stitch and continue to Sc around the remaining 3 sides, with *Sc, Ch 1, Sc* in each corner. Join to start of row 29(43, 57) with a SlSt. Tie off and leave a 20cm tail.
With the rectangle laying horizontally, bring the two short ends together to meet in the middle. Use the tails to weave through 4x to secure in place, Pull the ends to bunch the bow in the center. Tie ends together and trim.


Take a long length of yarn and wrap around the middle tightly. Tie ends together and leave 20cm tails.

I hope you enjoyed this pattern!